25 Stunning Holographic Nail Designs That Shine Bright
Let’s be real—your nails deserve better than that basic nude shade you’ve been sporting for months. You know the one I’m talking about! 🙂 If you’re ready to turn your fingertips into mesmerizing rainbow prisms that catch light like tiny disco balls, holographic nail designs are about to become your new obsession. Click here to level up your fashion game → What suits on you!
I’ve been experimenting with holographic nails for years, and trust me, nothing beats that moment when someone stops mid-conversation to ask, “Wait, how are your nails doing that?” Ready to create some serious nail envy? Let’s explore these jaw-dropping designs that’ll make your hands the star of every Instagram story.
What Makes Holographic Nails So Addictive?
Ever wondered why holographic nails have taken over social media feeds everywhere? The secret lies in holographic pigments that create an optical illusion, splitting light into multiple colors like a tiny rainbow on each nail. These microscopic particles reflect different wavelengths of light depending on the viewing angle.
I remember the first time I tried holographic polish—I spent an embarrassing amount of time just moving my hands around under different lights. The transformation from silver to pink to blue to green was absolutely hypnotic. You’ll find yourself doing the same thing, guaranteed.
The best part? Holographic nails work with any base color. Whether you prefer subtle shimmer or full-on rainbow madness, there’s a holographic design that’ll match your vibe perfectly.
Essential Supplies for Your Holographic Journey
Before we jump into the designs, let’s talk about what you’ll need. Getting professional-looking results starts with having the right tools in your arsenal.
Must-Have Products:
- Holographic nail polish (Linear or scattered finish)
- Quality base coat (prevents staining and extends wear)
- Fast-drying top coat (seals in the magic)
- Holographic powder (for extra sparkle)
- Small makeup sponges (for gradient effects)
- Thin nail art brushes (for detailed work)
IMO, investing in quality holographic polish makes all the difference. Cheap versions often look muddy or lack that intense color-shifting effect we’re after.
25 Show-Stopping Holographic Nail Designs
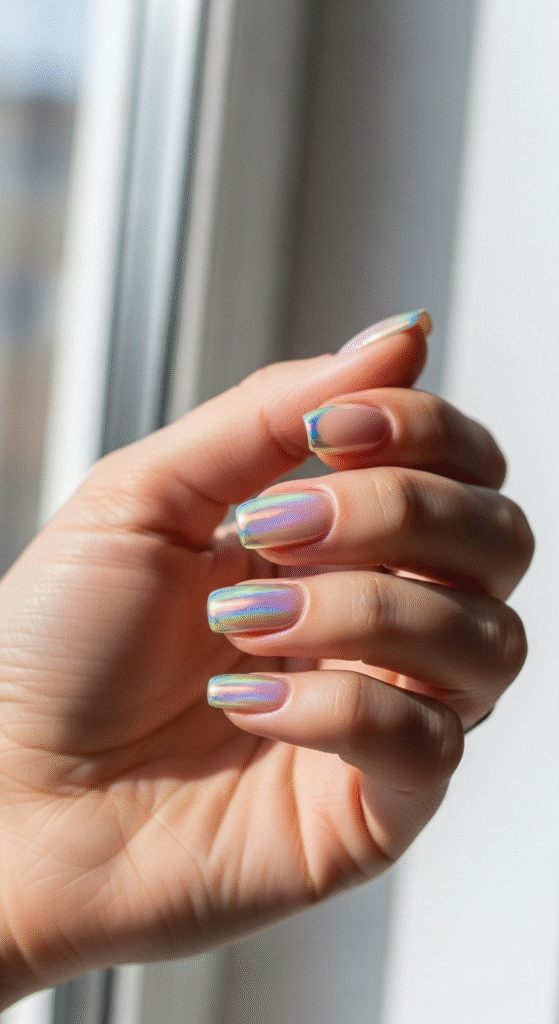
1. Classic Linear Holographic
Start with the basics—a full coverage linear holographic polish creates stunning rainbow stripes that move across your nails like liquid mercury. This design works beautifully on any nail length and requires zero artistic skill.
Apply two thin coats over your base, and watch the magic happen. The linear effect creates sharp, defined rainbow lines that shift dramatically as you move your hands.
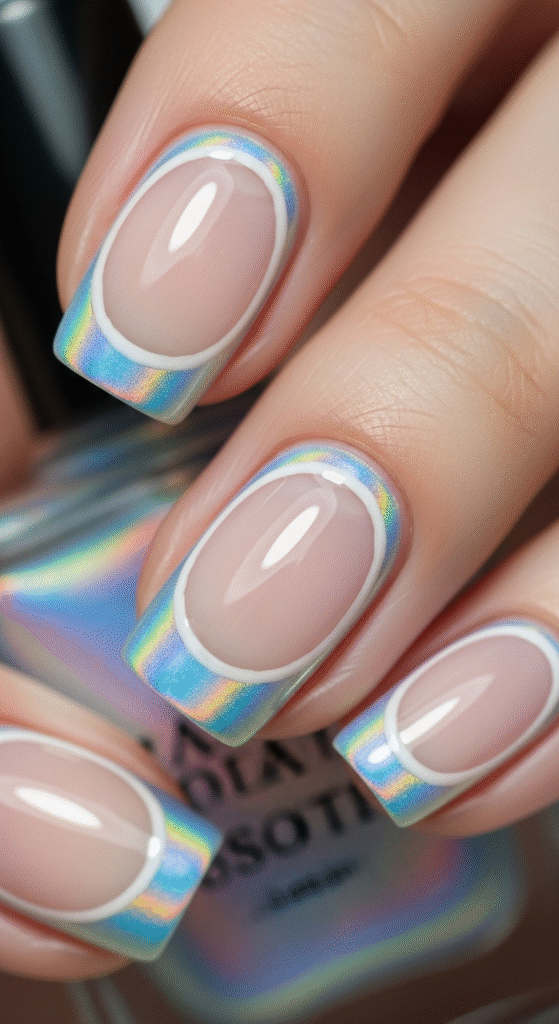
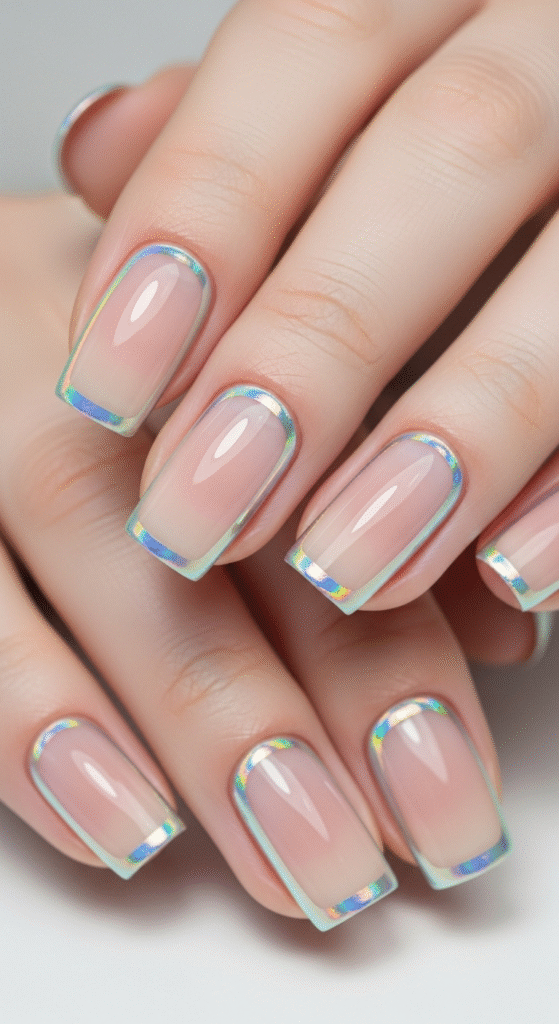
2. Holographic French Tips
Give the traditional French manicure a futuristic twist by replacing boring white tips with holographic polish. Keep your nail bed nude or clear, then paint just the tips with your favorite holo shade.
This design screams elegance with a twist of rebellion. Perfect for office settings where you want to be professional but still show your personality.
3. Scattered Holographic Ombré
Create a gradient effect using scattered holographic polish that fades from intense at the cuticle to subtle at the tips. Use a makeup sponge to dab and blend the polish for that perfect gradient.
The scattered particles create a softer, more diffused rainbow effect compared to linear holographic polishes. It’s like wearing tiny galaxies on your fingertips.
4. Holographic Accent Nail
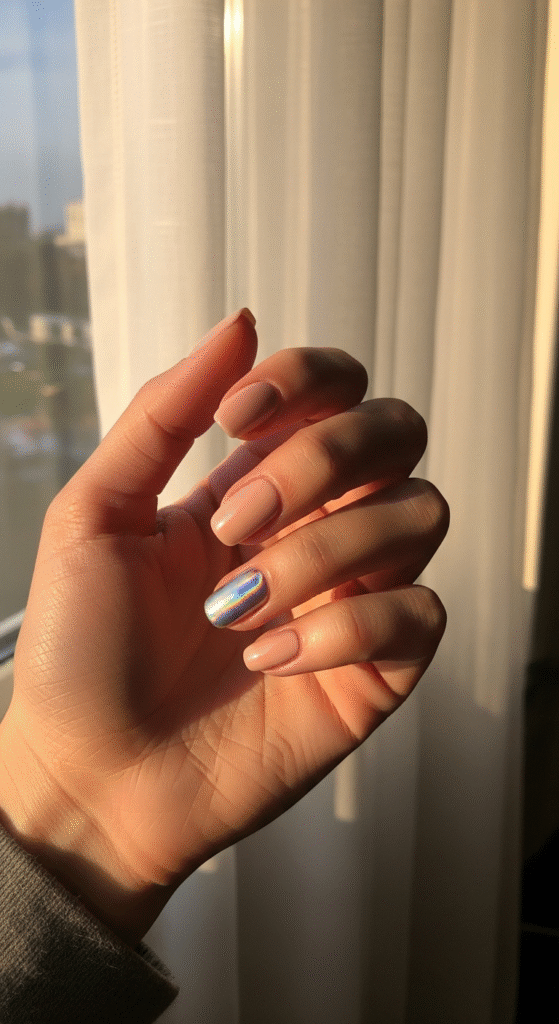
Not ready to commit to full holographic coverage? Try painting just your ring finger or middle finger with holographic polish while keeping the rest of your nails in a complementary solid color.
I love pairing a bright holographic accent nail with deep navy or black base colors. The contrast makes the holographic effect pop even more dramatically.
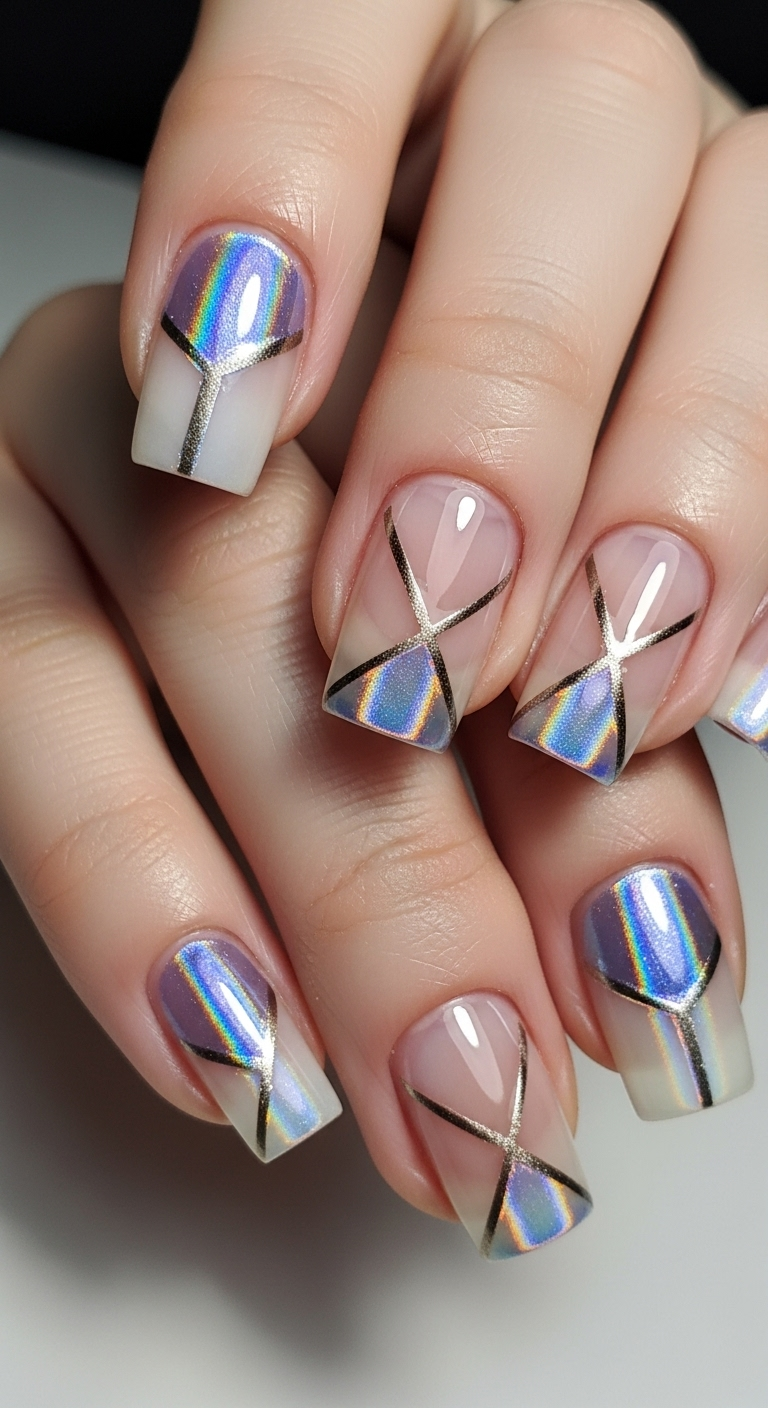
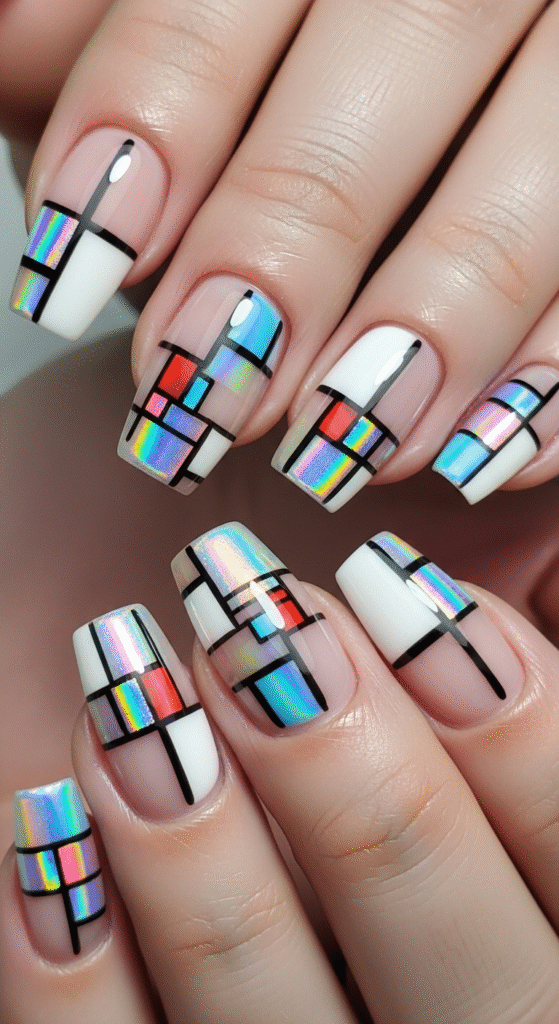
5. Holographic Geometric Patterns
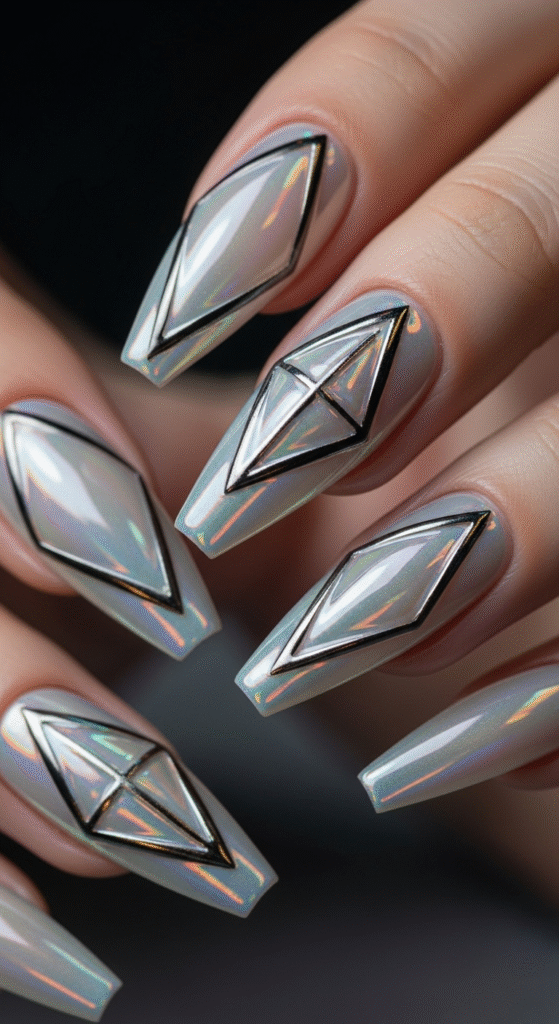
Use nail striping tape to create geometric shapes, then fill them with different holographic shades. Think triangles, diamonds, or modern art-inspired patterns.
This design requires patience but delivers incredible results. Each geometric section catches light differently, creating a kaleidoscope effect that’s absolutely mesmerizing.
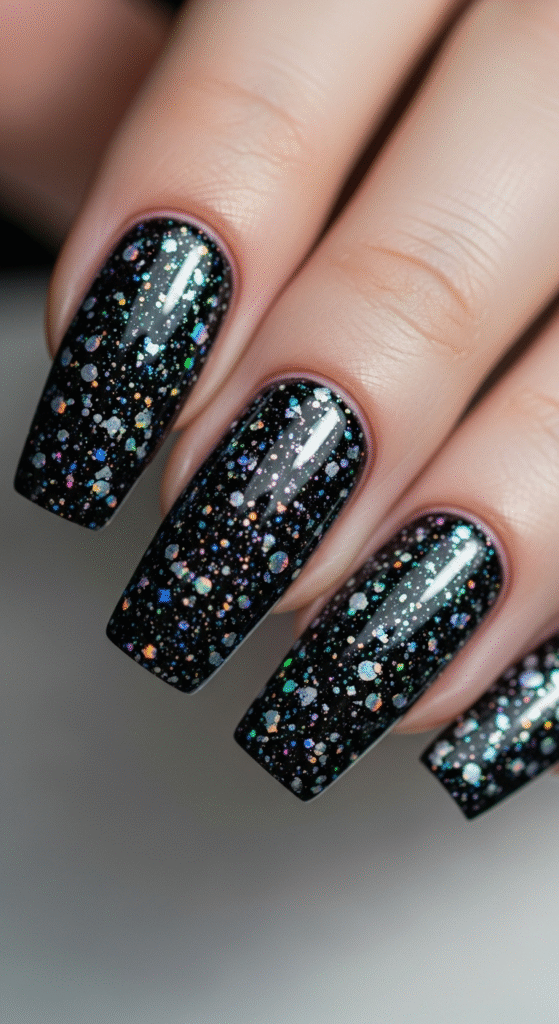
6. Holographic Galaxy Nails
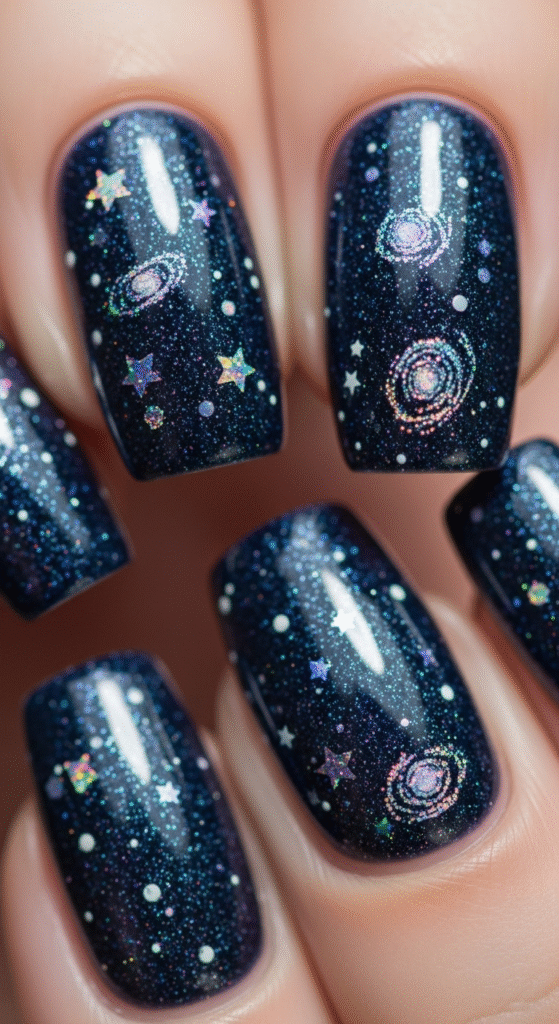
Combine dark base colors with holographic top coats and add tiny stars using white nail art pens. The result? Nails that look like you captured pieces of the universe.
Layer different holographic shades over black or deep purple bases for maximum cosmic effect. Add small dots of silver for distant stars.
7. Holographic Marble Effect
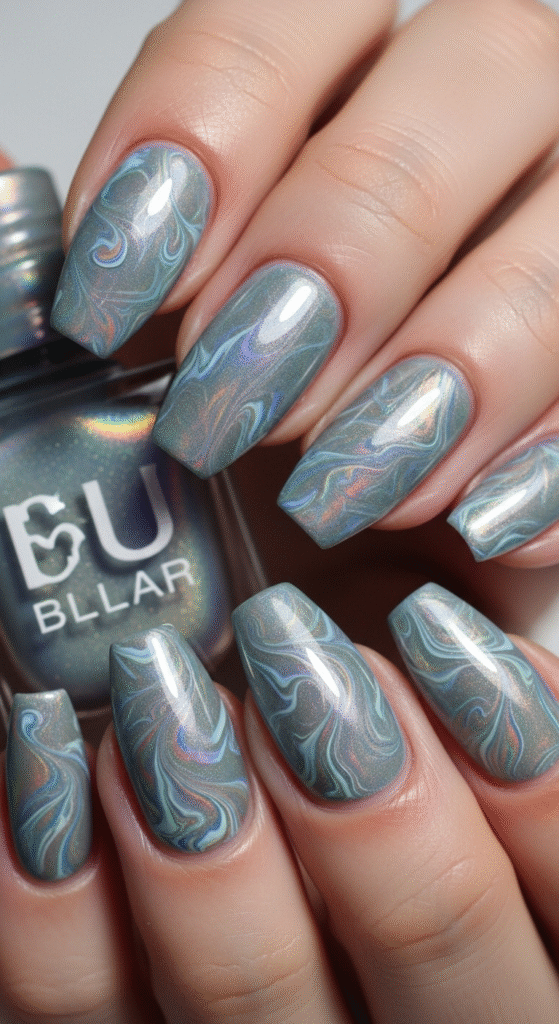
Create marbled patterns by dropping different holographic polishes into water, then dipping your nails to transfer the design. Each nail will be completely unique.
This technique takes practice, but the organic, flowing patterns you’ll create are worth the effort. No two nails will ever look exactly the same.
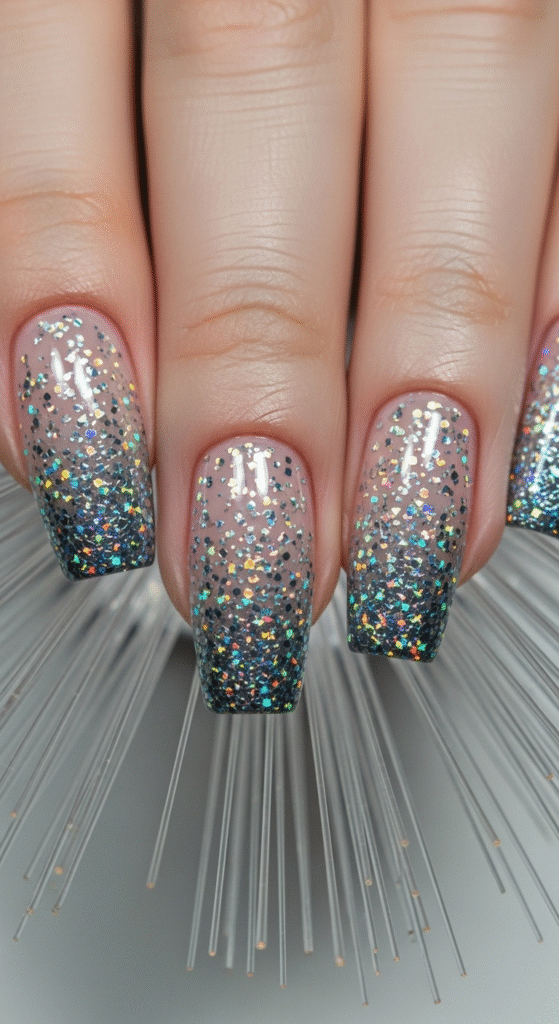
8. Holographic Glitter Gradient
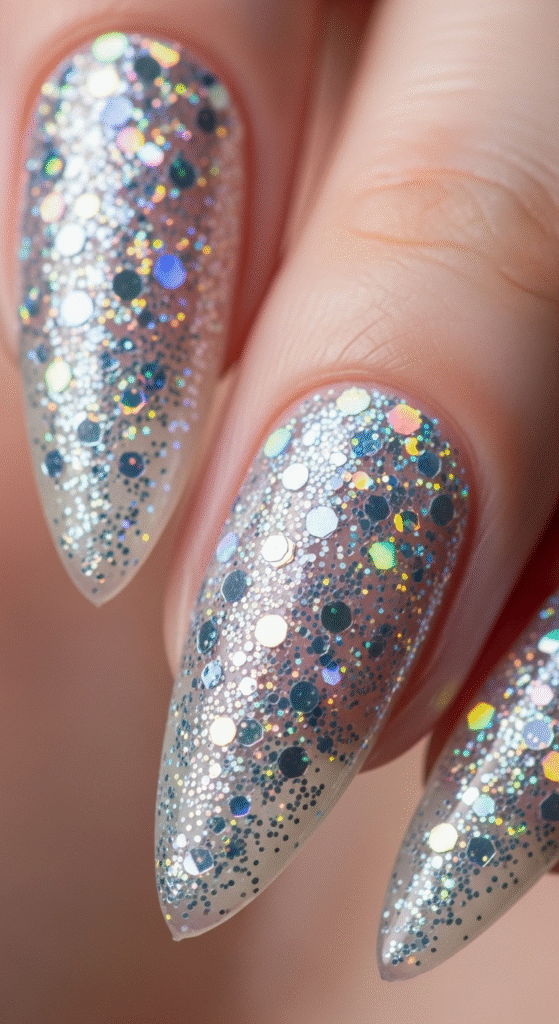
Start with a solid holographic base, then use a makeup sponge to add concentrated holographic glitter at the tips, fading toward the cuticles.
This creates incredible depth and dimension. The concentrated glitter at the tips catches light intensely while the base provides subtle shimmer.
9. Holographic Stamping Design
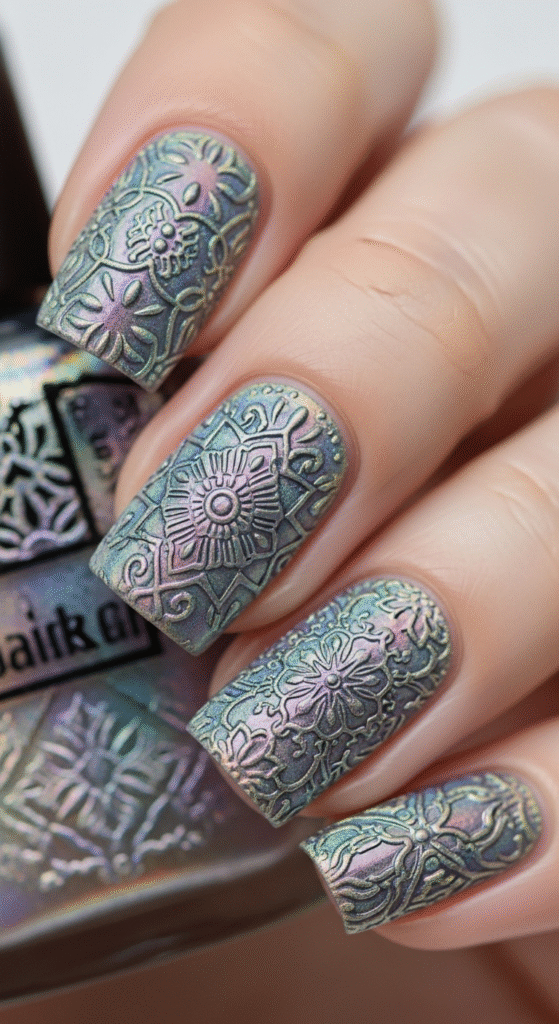
Use nail stamping plates with holographic polish to create intricate patterns. Flowers, lace, or mandala designs look incredible when done in holographic shades.
The raised stamped design catches light differently than the base, creating beautiful depth and texture that changes as you move your hands.
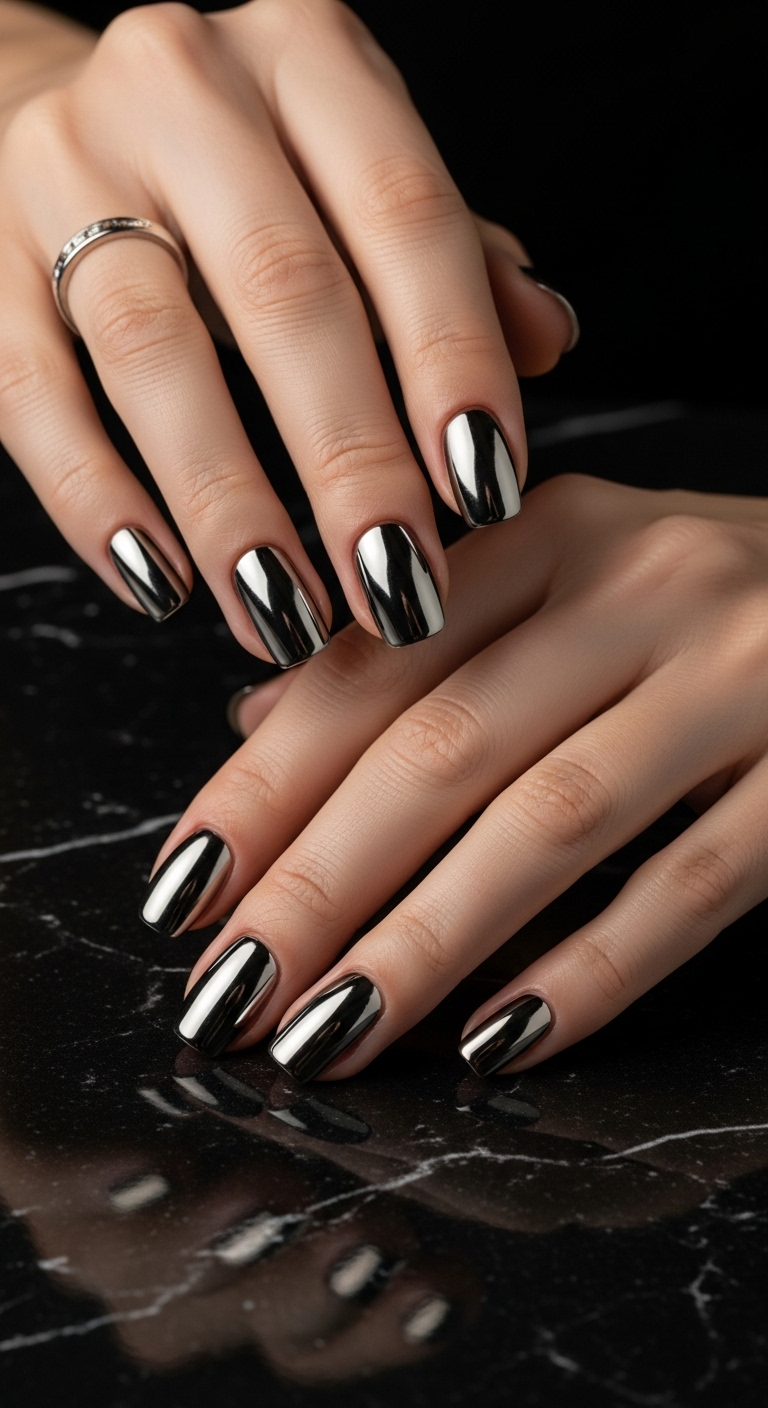
10. Holographic Chrome Effect
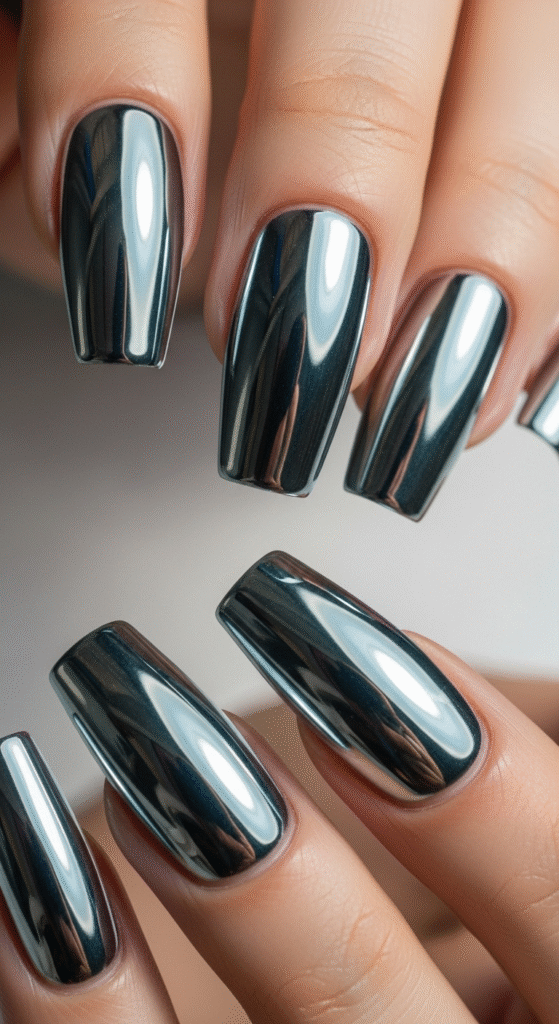
Apply holographic chrome powder over a black base for an ultra-modern, mirror-like finish that shifts through every color of the rainbow.
This technique requires rubbing the powder into slightly tacky gel polish, but the results are absolutely stunning. Your nails will look like liquid metal.
11. Holographic Negative Space
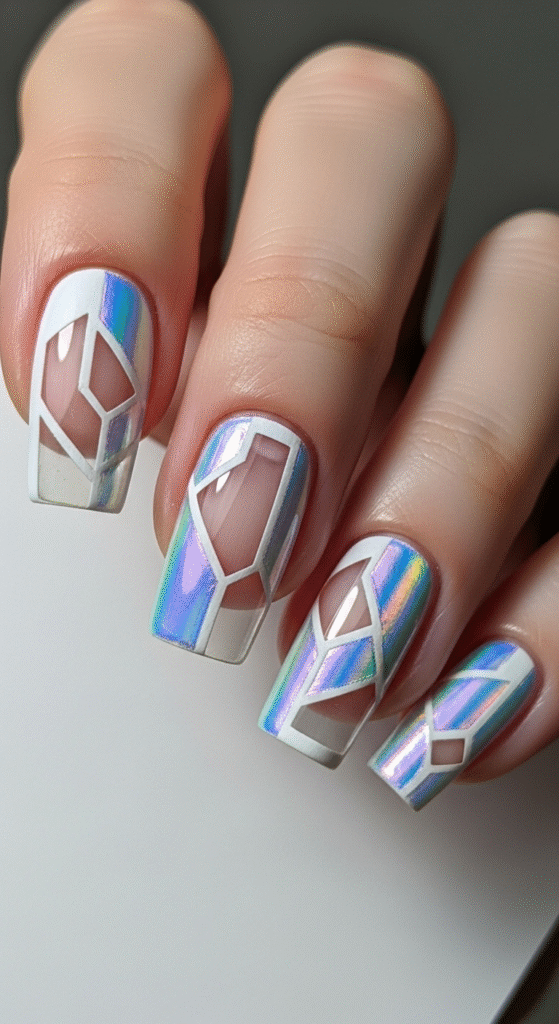
Leave portions of your nail bare while painting geometric holographic sections. The contrast between your natural nail and the holographic elements creates modern, artistic designs.
This minimalist approach lets the holographic elements really shine while keeping the overall look sophisticated and wearable.
12. Holographic Gradient Stripes
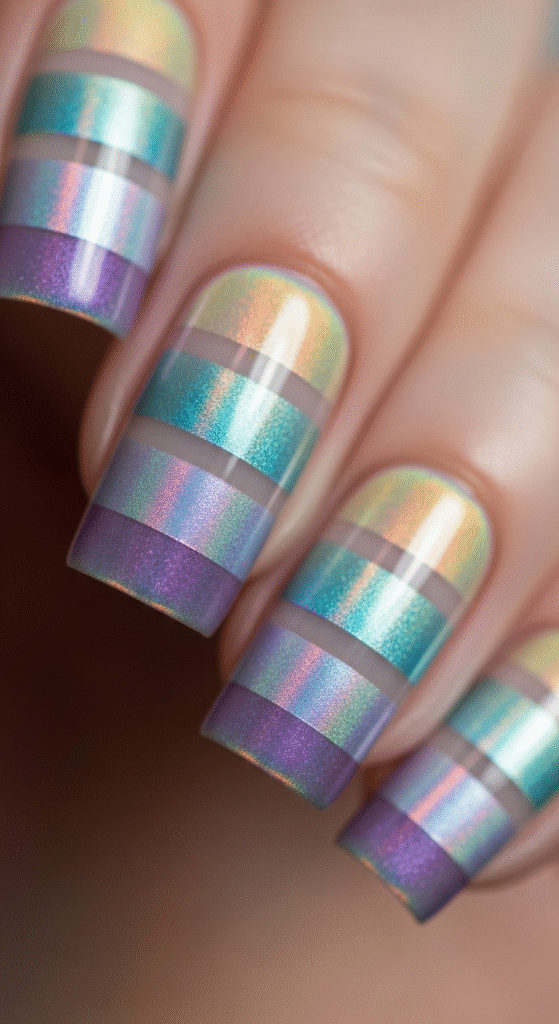
Paint horizontal or vertical stripes using different intensities of holographic polish, creating a gradient effect across your nail.
Use tape to create clean lines, then remove it while the polish is still slightly wet for the sharpest edges. The varying intensities create beautiful depth.
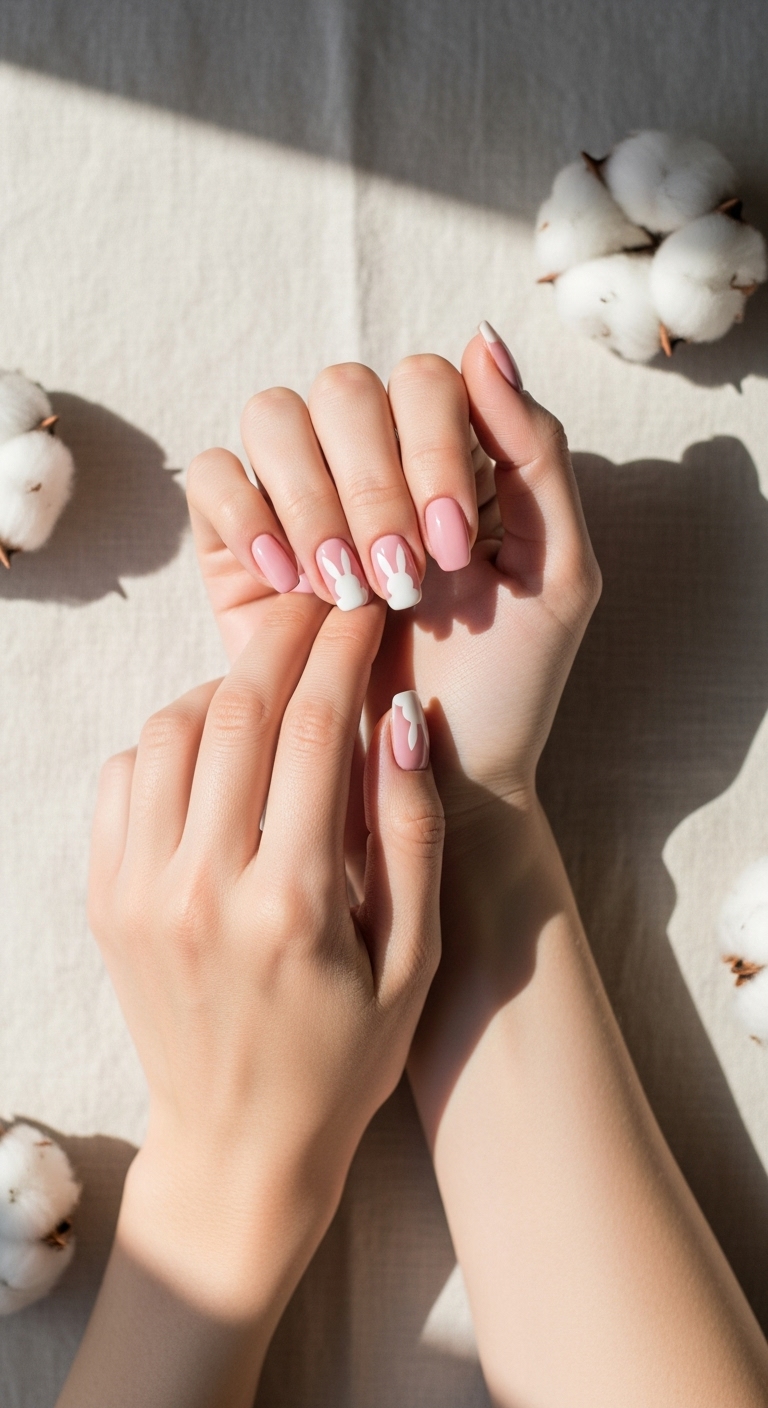
13. Holographic Floral Accents
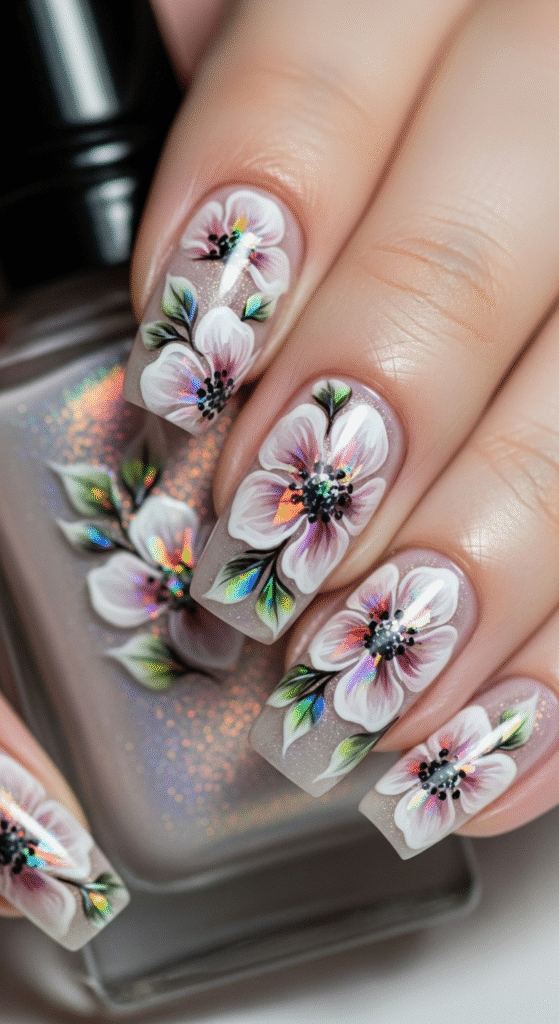
Paint simple flower shapes using holographic polish over a neutral base. Even basic five-petal flowers look magical when they shimmer with rainbow colors.
Add small green holographic leaves for a complete garden effect. The organic shapes contrast beautifully with the futuristic holographic finish.
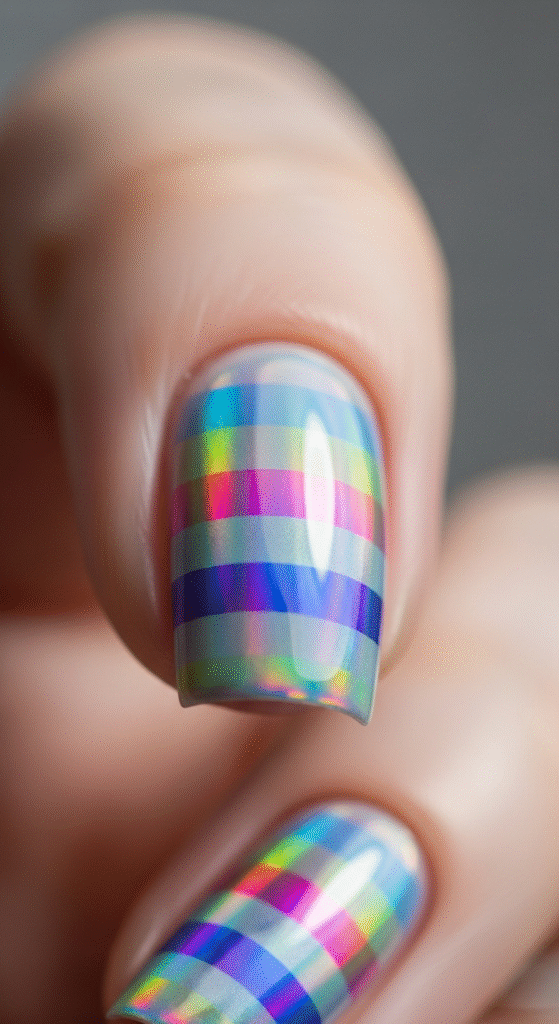
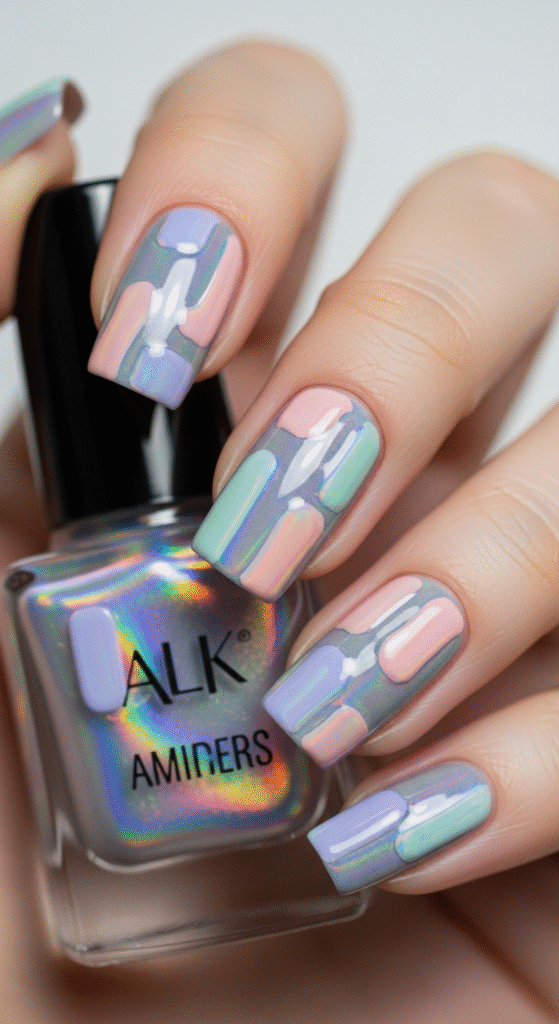
14. Holographic Color Blocking
Divide each nail into sections using tape, then fill each section with different holographic shades. Think color-blocked art meets rainbow magic.
This geometric approach works especially well on longer nails where you have more space to play with different color combinations.
15. Holographic Water Marble

Take traditional water marbling to the next level by using only holographic polishes. The swirled patterns create incredible depth and movement.
Each nail becomes a unique piece of wearable art. The marbled patterns catch light from multiple angles simultaneously.
16. Holographic Dot Art
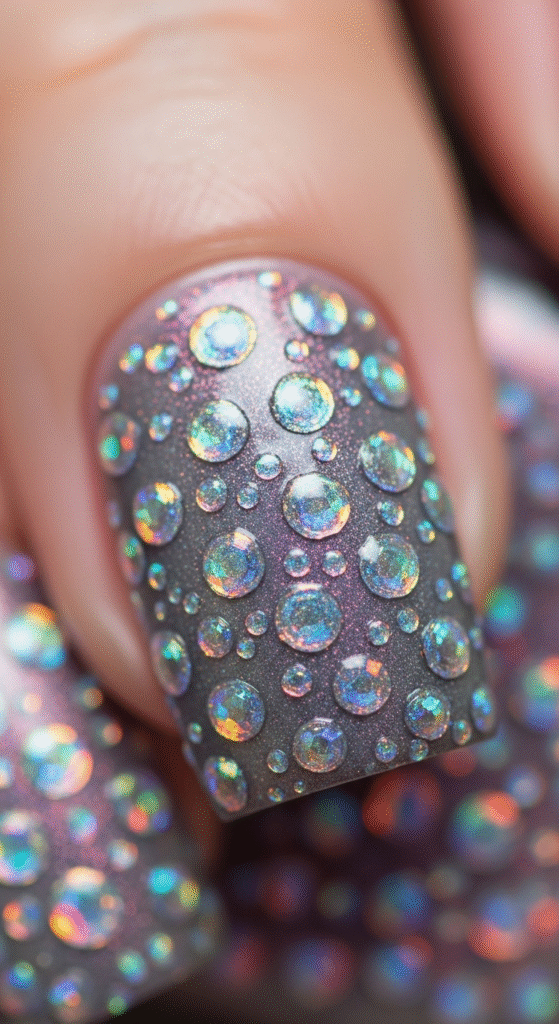
Use a dotting tool to create patterns with holographic polish over contrasting bases. Polka dots have never looked so futuristic!
Vary the dot sizes for more interesting compositions. Large dots at the base fading to smaller ones at the tips creates beautiful movement.
17. Holographic Half-Moon Design
Paint crescent shapes at the base of your nails with holographic polish, leaving the rest in a complementary solid color.
This retro-inspired design gets a modern upgrade with holographic elements. The curved shapes follow your nail’s natural contours beautifully.
18. Holographic Lightning Bolts
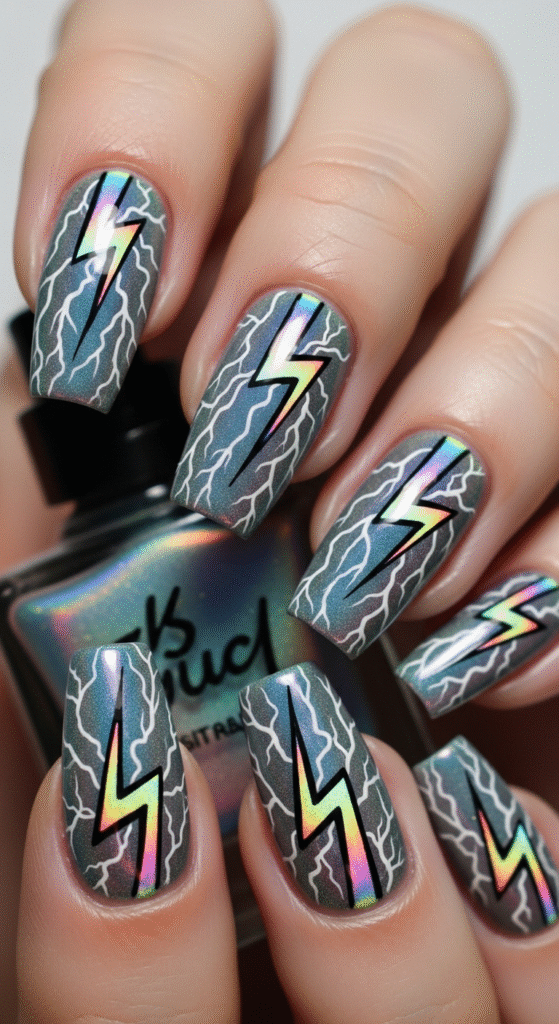
Create jagged lightning bolt patterns using thin brushes and holographic polish. These electric designs are perfect for making a bold statement.
Layer different holographic shades for each lightning bolt to create depth and the illusion of electrical energy.
19. Holographic Tribal Patterns
Use tribal-inspired geometric patterns painted in holographic shades over neutral bases. These intricate designs showcase the color-shifting properties beautifully.
The angular patterns create multiple surfaces that catch light differently, maximizing the holographic effect.
20. Holographic Sunset Gradient

Create a horizontal gradient that mimics a sunset, using warm holographic shades that transition from deep orange to bright pink to purple.
This design captures the magic of golden hour on your fingertips. The holographic elements make the “sunset” shimmer and dance.
21. Holographic Chevron Patterns
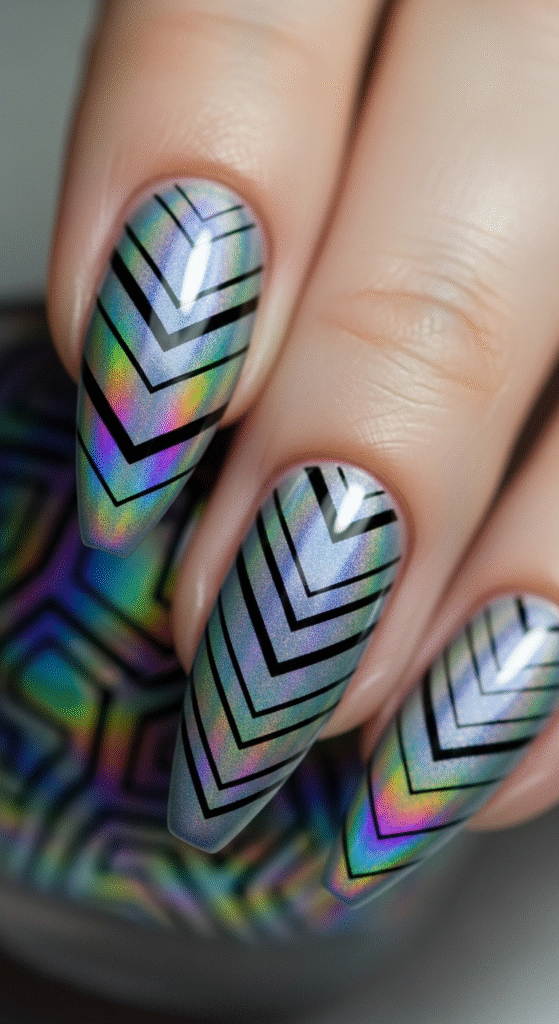
Paint V-shaped patterns using different holographic shades, creating zigzag designs that point in various directions.
The angular chevron shapes create dynamic light reflection patterns that change dramatically with hand movement.
22. Holographic Scales Effect

Create a mermaid scale pattern using holographic polish and nail art stencils. Each scale catches light individually, creating incredible texture.
This design works especially well with blue and green holographic shades that evoke oceanic themes.
23. Holographic Abstract Art
Let your creativity run wild with abstract brushstrokes using various holographic shades. Think modern art meets nail fashion.
There are no rules here—just layer different holographic colors in organic, flowing patterns that speak to your artistic soul.
24. Holographic Border Design
Paint thin borders around the edges of your nails using holographic polish, creating a frame effect that highlights your nail shape.
This subtle approach adds just a hint of holographic magic while remaining workplace-appropriate and sophisticated.
25. Holographic Galaxy Splatter
Create a space-inspired splatter effect by flicking holographic polish over dark bases using an old toothbrush. Add tiny white dots for distant stars.
This technique creates organic, random patterns that look like you captured actual stardust. Each nail tells its own cosmic story.
Pro Tips for Holographic Perfection
Getting professional-looking holographic nails at home requires a few insider tricks I’ve learned through years of experimentation.
Application Secrets:
- Always use a quality base coat to prevent staining
- Apply holographic polish in thin layers for maximum effect
- Work in good lighting to see the true color shifts
- Seal with a high-quality top coat to prevent chipping
The biggest mistake I see people make? Applying holographic polish too thickly. Thin layers create better light refraction and more intense color shifts.
Maintaining Your Holographic Masterpiece
Want your holographic nails to stay stunning for weeks? Here’s how I keep mine looking fresh.
Maintenance Must-Dos:
- Apply cuticle oil daily to prevent lifting
- Wear gloves while cleaning to protect the finish
- Touch up chips immediately to prevent spreading
- Reapply top coat every few days for maximum shine
FYI, holographic polishes tend to show wear differently than regular polishes, so staying on top of maintenance is crucial for keeping that mirror-like finish.
Final Thoughts: Your Holographic Journey Awaits
These 25 holographic nail designs prove that your fingertips can be both fashion statement and conversation starter. Whether you prefer subtle shimmer or full-on rainbow explosion, there’s a holographic design that matches your personality perfectly.
Remember, the best nail art comes from experimentation and having fun with the process. Don’t be afraid to combine techniques or create your own variations—some of my favorite designs happened completely by accident!
Your nails are tiny canvases waiting for their holographic transformation. Which design will you try first? Trust me, once you go holographic, regular polish will never feel exciting enough again. Now excuse me while I go admire my latest holographic creation under every light source in my house 🙂