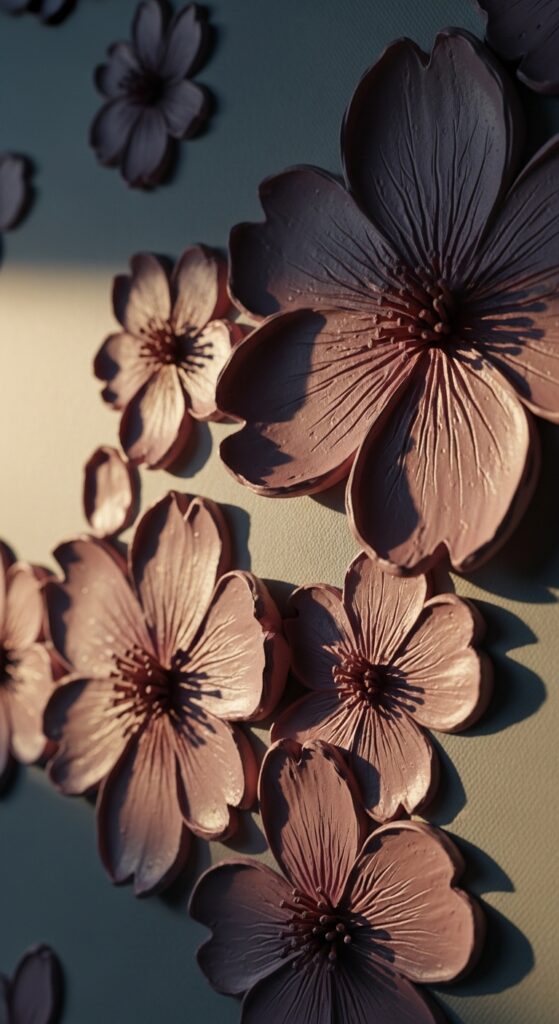
15 Beautiful Sakura Cherry Blossom Nails for Spring 2025
Spring’s knocking at the door, and you know what that means? Time to ditch those dark winter vibes and embrace something fresh, feminine, and absolutely gorgeous. I’m talking about sakura cherry blossom nails – the nail art trend that’s about to take over your Instagram feed (and honestly, your heart too).
Look, I’ve been obsessed with cherry blossom designs since I first saw them blooming in my neighbor’s yard three springs ago. There’s something magical about those delicate pink petals that just screams “new beginnings” and “I’ve got my life together” energy. Whether you’re a nail art newbie or someone who’s been perfecting their cuticle game for years, these 15 sakura designs will have you feeling like you just stepped out of a Japanese garden. Click here to level up your fashion game → What suits on you!
1. Classic Pink Gradient Sakura
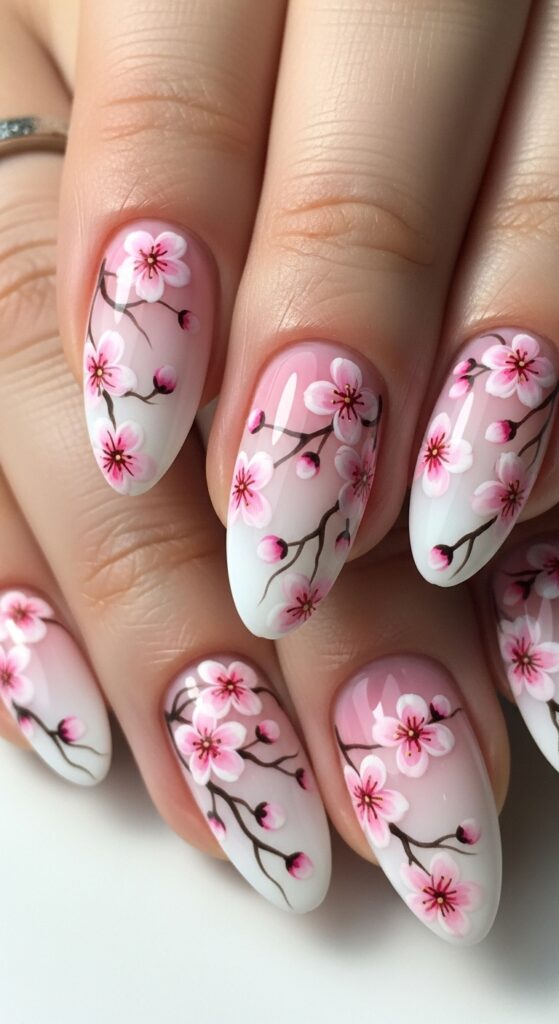
Let’s start with the OG – the classic pink gradient base with hand-painted cherry blossoms. This design never goes out of style, and honestly, why would it? I create a soft ombre effect using light pink at the base that fades to white at the tips, then add delicate five-petaled blossoms in varying shades of pink.
The trick here is layering your colors gradually. Start with three thin coats instead of one thick one – trust me on this. Your gradient will look smoother, and the cherry blossoms will pop against that dreamy background.
Key features:
- Soft pink-to-white gradient base
- Hand-painted five-petal blossoms
- Tiny brown branches for authenticity
- Clear top coat for longevity
2. Minimalist Single Blossom Accent

Sometimes less really is more, right? This design features one perfectly placed cherry blossom on a nude or clear base. I love this for people who want to dip their toes into the sakura trend without going full-on floral explosion.
Position your single blossom slightly off-center – it creates visual interest and feels more organic. Add a few tiny buds along a delicate branch, and you’ve got elegance personified.
3. Sakura French Tips
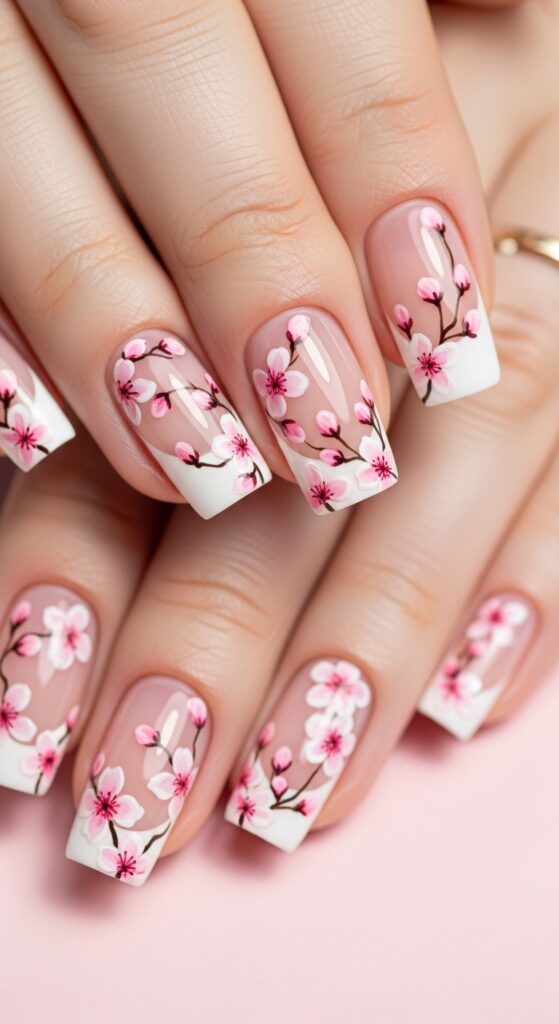
Who says French manicures have to be boring? I’ve been experimenting with sakura-inspired French tips, and the results are absolutely stunning. Replace that traditional white tip with soft pink cherry blossoms that seem to dance along your nail edges.
The secret is creating irregularly shaped “tips” that mimic how cherry blossoms naturally cluster on branches. No two nails should look identical – nature isn’t perfect, and neither should your nail art be 🙂
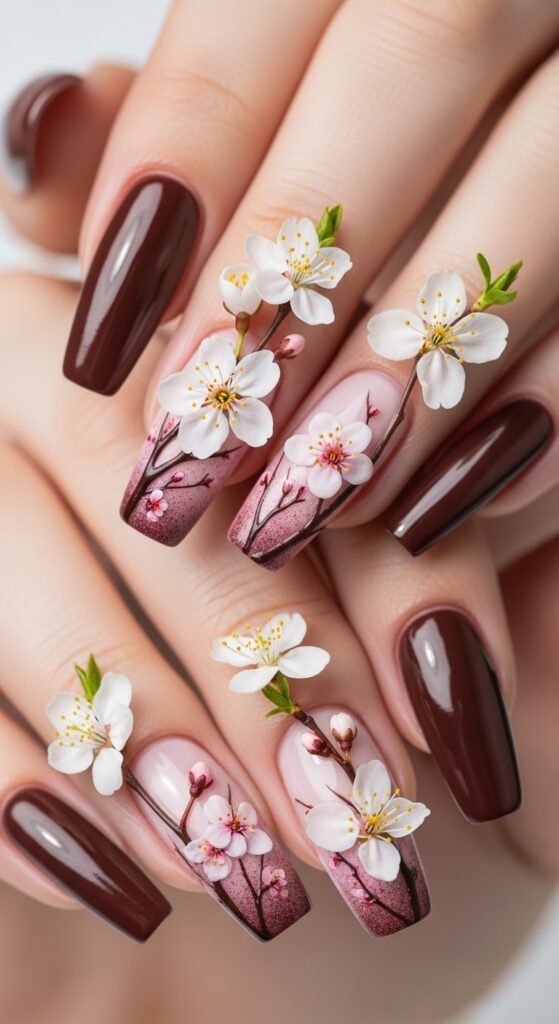
4. 3D Textured Cherry Blossoms
Ready to take things up a notch? 3D textured sakura nails add dimension that photographs beautifully and feels amazing under your fingertips. I use acrylic paint to build up the petals, creating actual texture you can feel.
This technique requires patience, but the payoff is incredible. Each blossom becomes a tiny sculpture, and the light catches them differently throughout the day. Fair warning though – you might find yourself constantly admiring your own hands!
Pro tips for 3D texture:
- Work with one nail at a time
- Let each layer dry completely
- Use a small brush for petal details
- Seal with extra top coat
5. Watercolor Sakura Wash
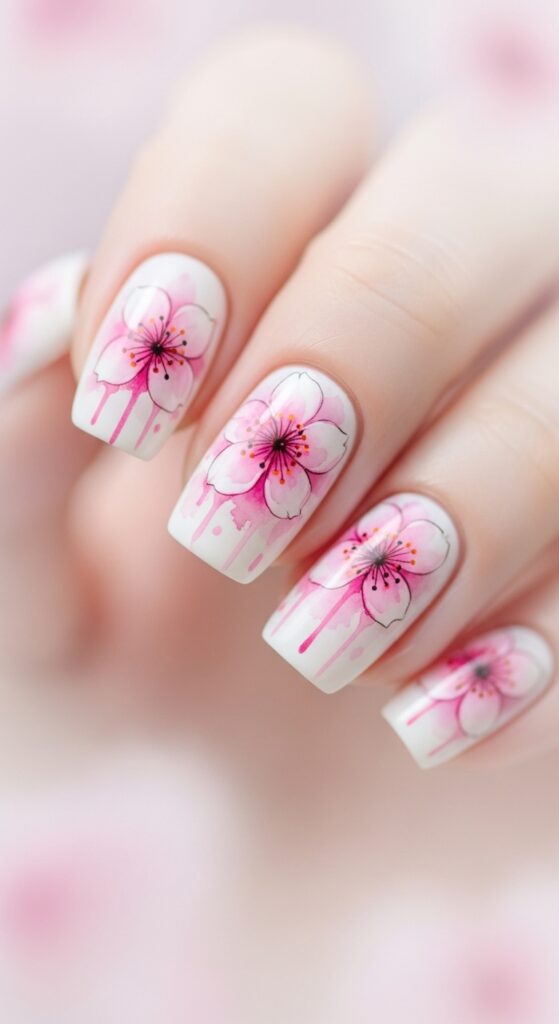
Ever tried the watercolor technique with cherry blossoms? It’s dreamy, ethereal, and surprisingly forgiving for beginners. I blend soft pinks, whites, and the tiniest hint of yellow to create that watercolor paper effect.
The beauty of this design lies in its imperfection. Blotchy areas and color bleeds actually enhance the artistic vibe. Sometimes I add a few defined blossoms over the watercolor base for contrast.
6. Negative Space Branch Design
Negative space nail art is having a major moment, and sakura designs are perfect for this technique. I paint delicate branches that seem to grow across your natural nail, with cherry blossoms blooming at strategic points.
This design works especially well on shorter nails. The negative space keeps things feeling light and airy – perfect for spring’s fresh energy.
7. Glitter Sakura Explosion
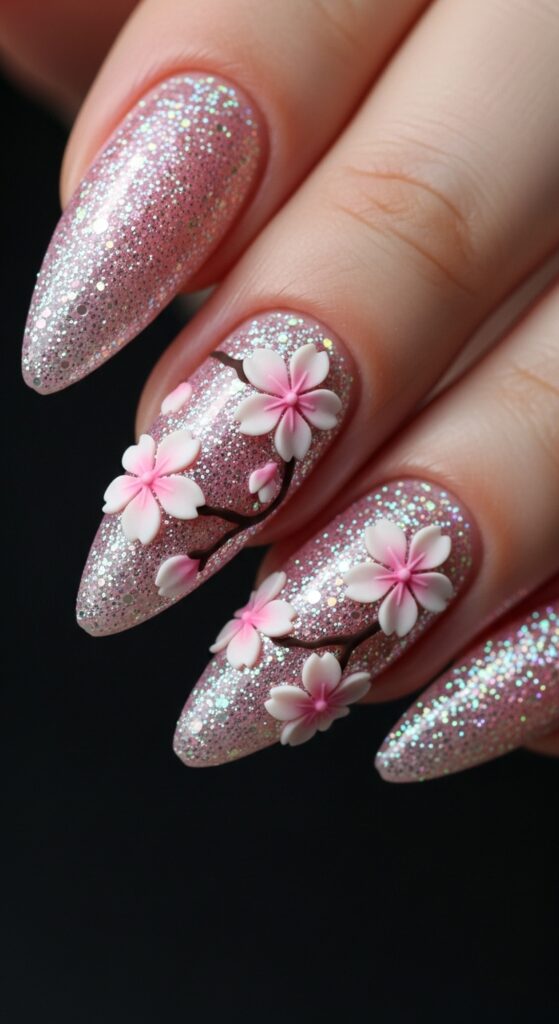
Sometimes you just need sparkle in your life, am I right? Glitter sakura nails combine the romance of cherry blossoms with the glamour of shimmer. I use fine pink and white glitters as a base, then paint darker pink blossoms on top.
The contrast between matte blossoms and sparkly background creates depth that’s absolutely mesmerizing. Plus, catching the light throughout your day gives you those little moments of joy we all need.
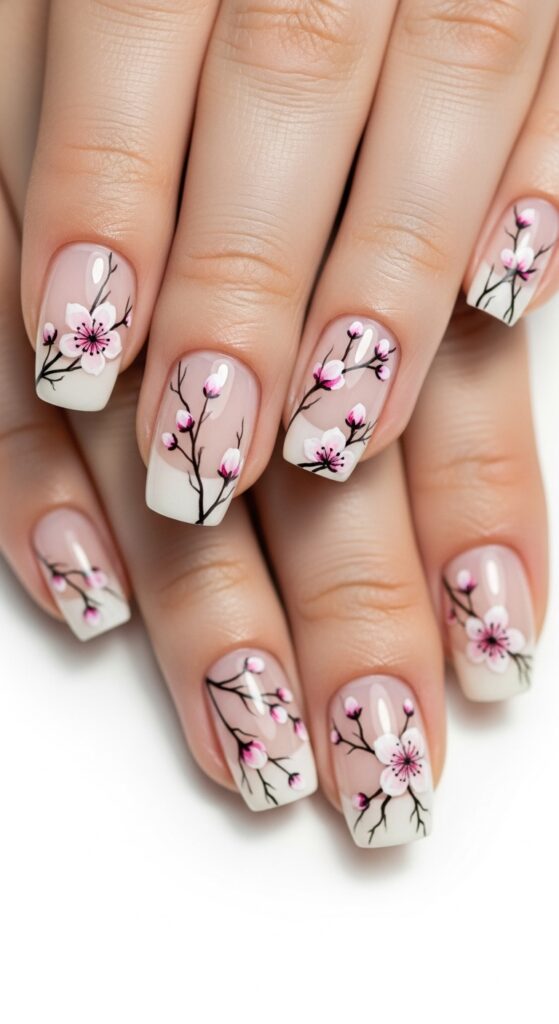
8. Ombre Branch Technique
This design features branches that gradually change color as they stretch across your nails. Start with deep brown at the base and fade to soft pink at the tips, with cherry blossoms blooming along the way.
I love how this technique tells a story – like watching a branch come to life as spring progresses. It’s romantic, artistic, and surprisingly wearable for everyday life.
9. Micro Sakura Clusters
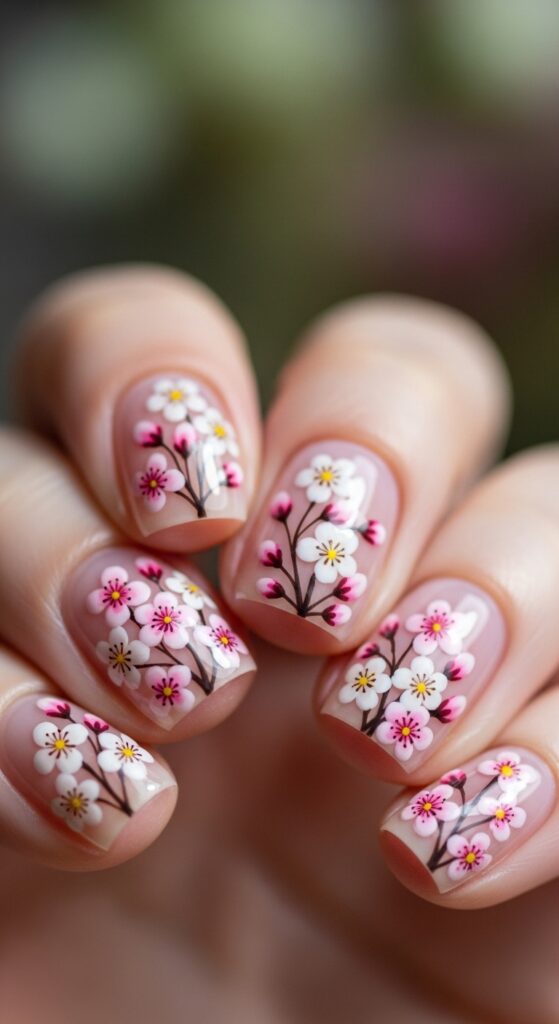
Perfect for shorter nails, micro cherry blossom clusters pack maximum impact into minimal space. I focus on creating tiny, detailed blossoms grouped together rather than sprawling designs.
The key is precision – use the smallest brush you can find and take your time. These little clusters are like precious jewelry for your fingertips.
Essential tools:
- Size 000 detail brush
- High-quality acrylic paints
- Magnifying glass (seriously!)
- Steady hands and patience
10. Sakura Stamping Art
Not everyone has the steadiest hand for freehand painting, and that’s totally fine! Sakura stamping plates let you achieve professional-looking results with minimal effort. I use these as a base and add personal touches with hand-painted details.
The stamping technique gives you consistent, clean lines that would take hours to paint manually. Then you can customize with additional colors or small hand-painted elements.
11. Mixed Media Sakura
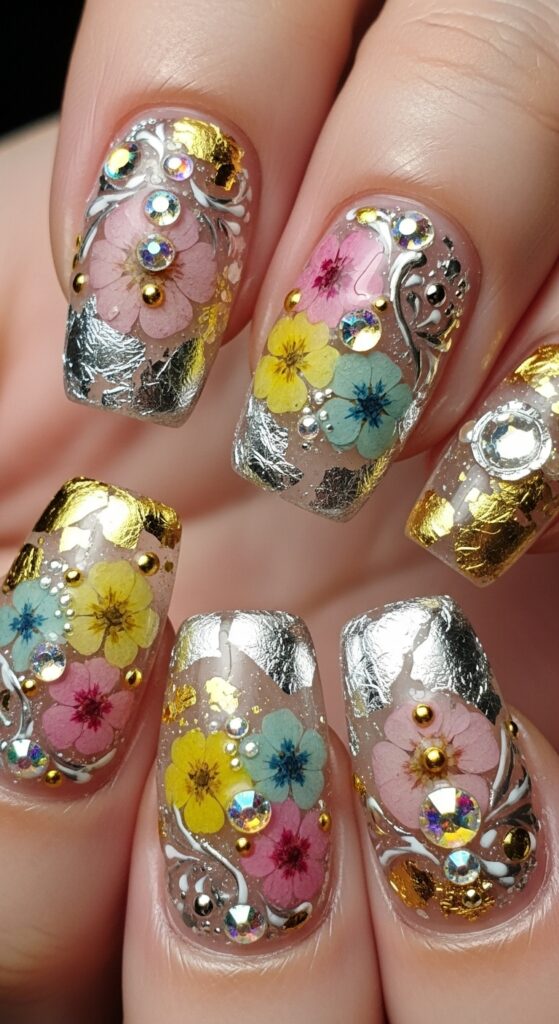
Why stick to just paint? Mixed media sakura designs incorporate dried flowers, foil, rhinestones, and paint for texture that’s absolutely stunning. I press tiny dried flowers into wet top coat, then paint around them.
This technique creates nails that are basically tiny art pieces. Each one is unique, and the combination of materials adds visual interest that photographs beautifully.
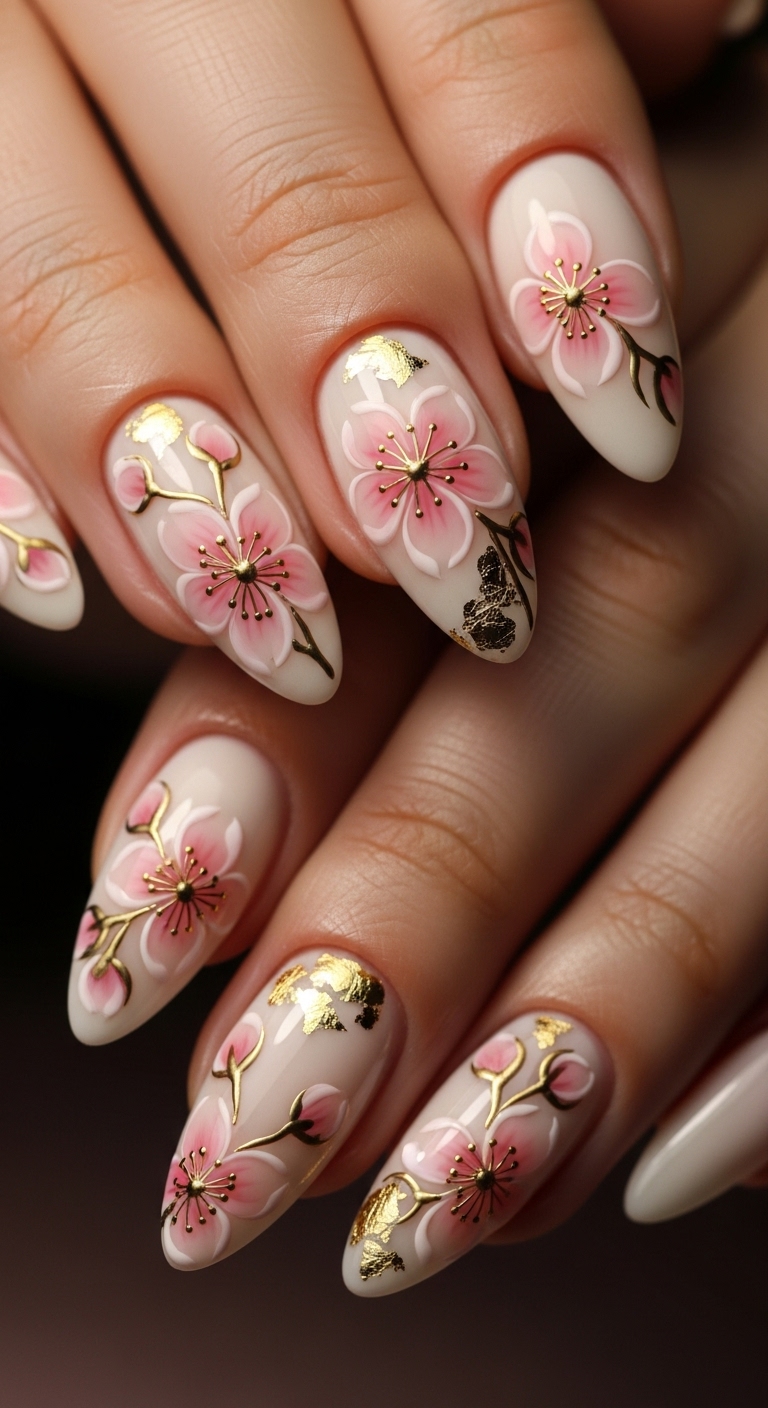
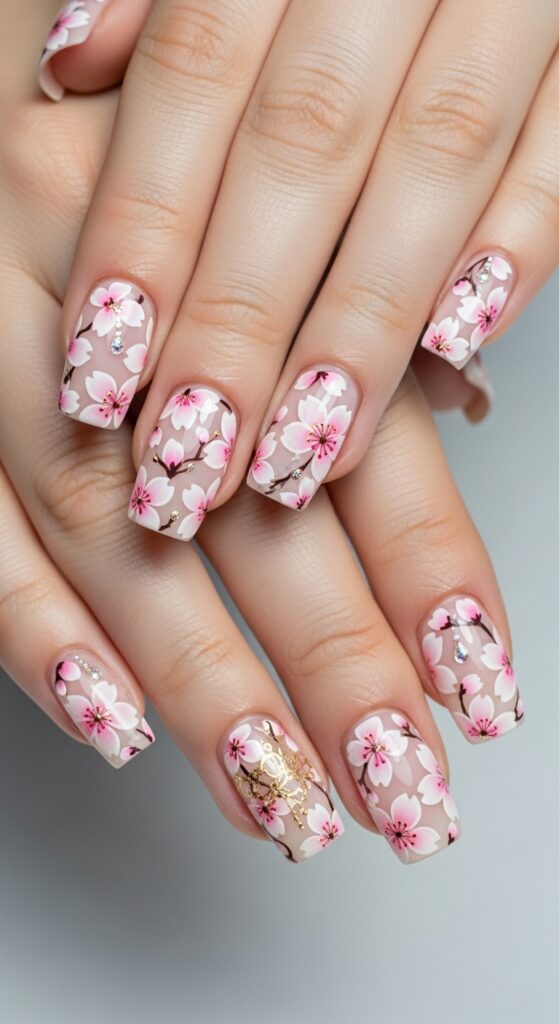
12. Vintage Sakura with Gold Accents

There’s something timelessly elegant about cherry blossoms paired with gold details. I paint soft pink blossoms over a cream base, then add delicate gold branches and tiny gold dots for flower centers.
This design feels expensive and sophisticated – perfect for special occasions or when you want to feel a little more glamorous than usual. The gold catches light beautifully and elevates the entire look.
13. Geometric Sakura Fusion
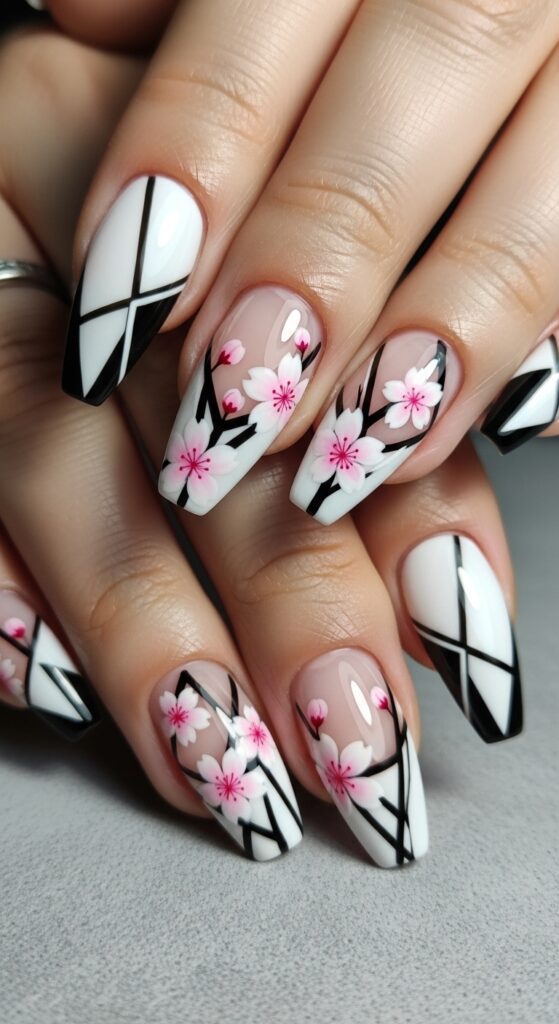
Modern meets traditional in this geometric sakura design. I combine clean lines, triangles, and negative space with organic cherry blossom shapes. It’s unexpected and totally Instagram-worthy.
The contrast between geometric precision and organic flower shapes creates visual tension that’s really compelling. Plus, it’s a conversation starter – people always want to know how you came up with such a unique combination.
14. Sunset Sakura Gradient

Picture this: cherry blossoms silhouetted against a gorgeous sunset sky. I create an orange-to-pink-to-purple gradient base, then paint dark cherry blossom silhouettes on top.
This design captures that magical golden hour feeling when cherry blossoms look absolutely ethereal. It’s romantic, dramatic, and surprisingly versatile with different outfit colors.
Color combination suggestions:
- Coral, pink, lavender fade
- Peach, rose gold, deep purple
- Yellow, orange, magenta blend
- Soft pink, white, baby blue
15. Classic Japanese Inspired Design
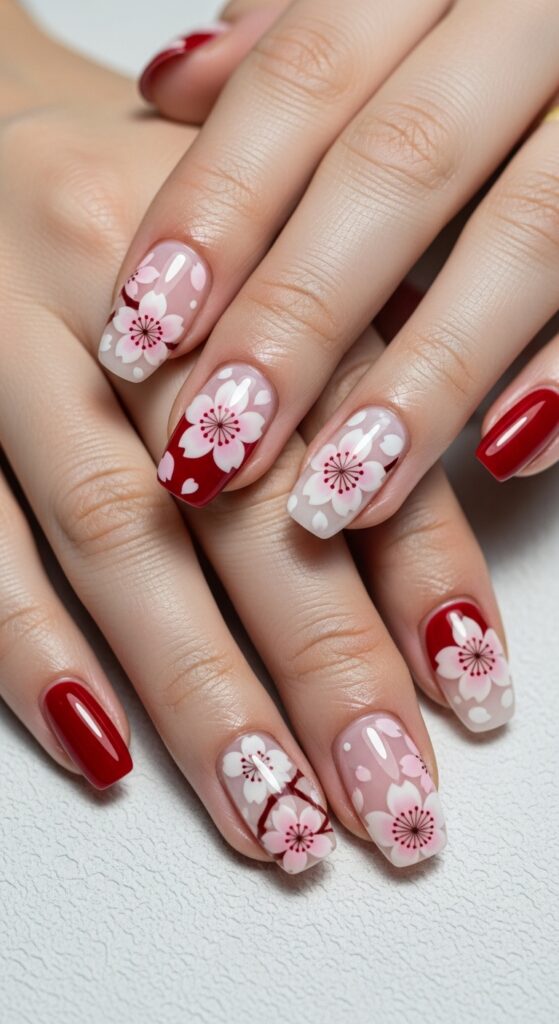
Let’s end where it all began – traditional Japanese cherry blossom art translated to nails. I study actual Japanese artwork for inspiration, focusing on authentic color palettes and petal shapes.
This design honors the cultural significance of sakura while creating something beautiful for modern wear. I use soft pinks, whites, and the occasional deep red accent, just like you’d see in traditional paintings.
Pro Tips for Perfect Sakura Nails
Want your cherry blossom nails to look professionally done? Here are my tried-and-true secrets:
Base preparation is everything. Clean, shaped nails with a quality base coat make all the difference. I spend extra time on this step because it’s the foundation for everything else.
Layer your colors gradually. Whether you’re creating gradients or building up petals, thin layers always look better than thick, gloopy applications. Patience pays off here.
Study real cherry blossoms. I keep photos of actual sakura trees on my phone for reference. Real petals have specific shapes and growth patterns that make designs look authentic.
Invest in quality brushes. You don’t need expensive ones, but having a variety of sizes – especially tiny detail brushes – makes intricate work so much easier.
Maintenance and Longevity
Let’s be real – you want these beautiful nails to last longer than a weekend, right? I’ve learned a few tricks for extending the life of detailed nail art:
Always use a quality top coat. This protects your artwork and adds shine that makes colors pop. I reapply every few days to maintain that fresh-from-the-salon look.
Wear gloves for cleaning and gardening. I know it sounds obvious, but harsh chemicals and rough work destroy delicate nail art faster than anything else.
Touch up small chips immediately. Don’t wait until half your design has worn away – small fixes are barely noticeable and extend your manicure’s life significantly.
Conclusion
There you have it – 15 absolutely gorgeous sakura cherry blossom nail designs that’ll have you feeling like spring personified. From minimalist single blossoms to elaborate 3D masterpieces, there’s something here for every skill level and style preference.
IMO, cherry blossom nails are more than just a trend – they’re a celebration of renewal, beauty, and the delicate strength that comes with embracing feminine energy. Whether you tackle these designs yourself or bring this list to your nail artist, you’re going to absolutely love the results.
Spring 2025 is going to be your most beautiful season yet, starting right at your fingertips. Now excuse me while I go admire my own sakura nails for the hundredth time today – they’re just too pretty not to stare at! 🙂